Old Movie Effect Overlay
First of all, thank you very much for your purchase of my hand-crafted old movie effect. This documentation is about how to adjust the old movie effect according to your needs. You can control every pixel of the overlay in the well organized FLA file. The overall look is going to be finished in Adobe Premiere.There is no need to modify the After Effects Project file as this is just required as a container that can be imported into Adobe Premiere. That does not mean that you cannot create additional effects in the After Effects composition.
If you are familiar with Adobe Animate and Premiere you will surely find out how to modify all relevant parts of the effect. If not, please read on to get some tips about how to efficiently modify the FLA files and the effects in Adobe Premiere. Let's get started.
Files included in the package
- The FLA files
- The After Effects Project file
- The Premiere Project file
- Sample clip (longboarding)
The package contains premade FLA's, After Effects compositions and Premiere sequences for the most common frame sizes:
- 1920x1080 (Full HD)
- 2048x1080 (2k)
- 3840x2160 (UHD)
- 4096x2160 (4k)
- 4096x2304 (4k 16:9)
Modifying The FLA files
Please note: Whenever I mention "Flash" this is synonymous with "Animate". I'm old-school and I prefer to call this software by its original name "Flash". That's even what the file name extension stands for.
The FLA files contain all the graphics and animations in the overlay clips (the SWF files imported via After Effects into your Premiere sequence). Adjust the library symbols according to your needs. If you are familiar with Flash (Animate) you know how to handle and modify the clips. If not, please read the following advice on how to modify the FLA files.
The Full HD and 2k variants contain the same graphics like the UHD and 4k variants contain the same graphics. In particular the main difference is the stroke width. To achieve the same visual appearance in the 2k and 4k versions for your final video output the stroke widths have to be adjusted. It's 2px for the 2k FLA's and 4px for the 4k FLA's. If you like the stroke to be thicker, pay attention to have twice the stroke width in the 4k versions.
The hand-crafted old movie effect in the FLA files is made of 5 parts (timeline layers + appropriate library symbol)
- The vertical strokes (2 layers, 2 library symbols)
- The dust and scratches (1 layer, 6 library symbols)
- The flickering (1 layer, 2 library symbols)
- The vignette (1 layer, 1 library symbol)
- The sepia color toning (1 layer, 1 library symbol)
- Special techniques from the modify menu
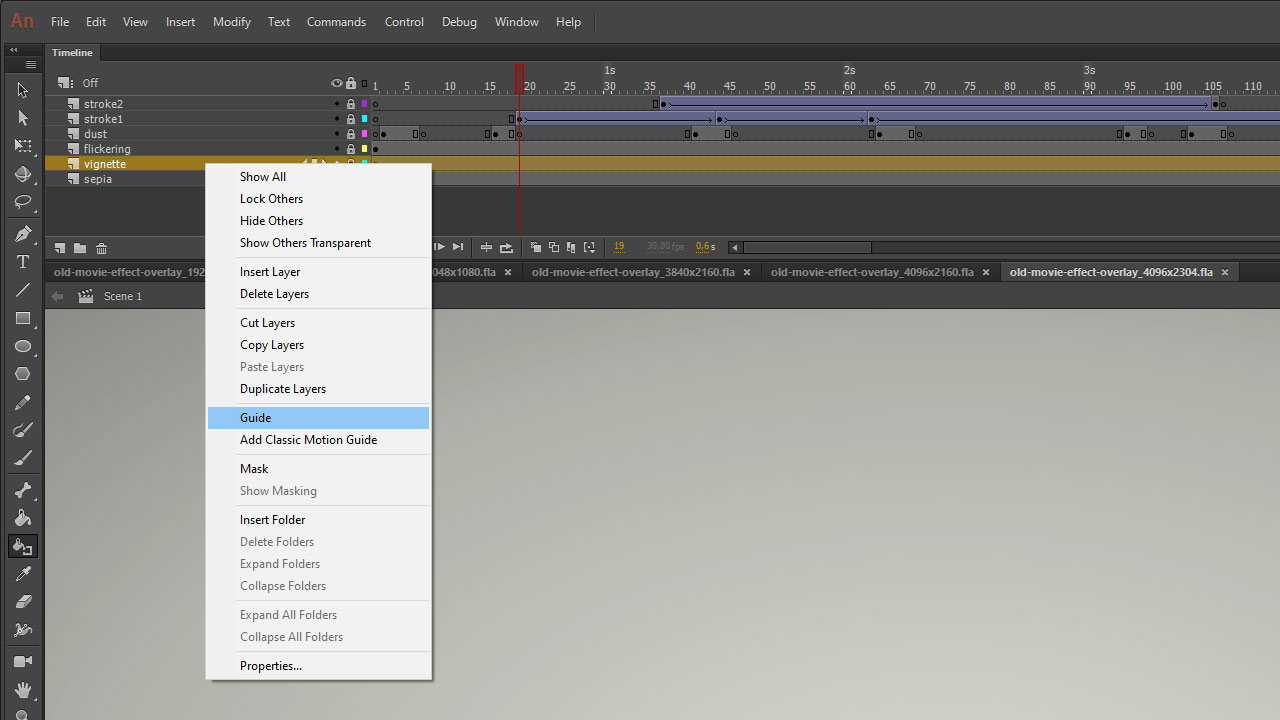
If you do not want to have one of the FLA effect layers in your final animation (SWF output) without deleting it, right-click the layer and choose "guide" to make this layer invisible in the SWF output. Do the same to have it back again in your SWF output (remove the "guide" state). You can do this for every layer you do not want to have in your final animation (SWF).
Maybe you want to create and adjust the vignette with the Lumetri Color effect settings, so you can disable the vignette in the FLA. Just pay attention that you are free to choose the vignette's color in the FLA file whereas you can only choose white or black for the vignette in the Lumetri Color effect settings.
The vertical strokes
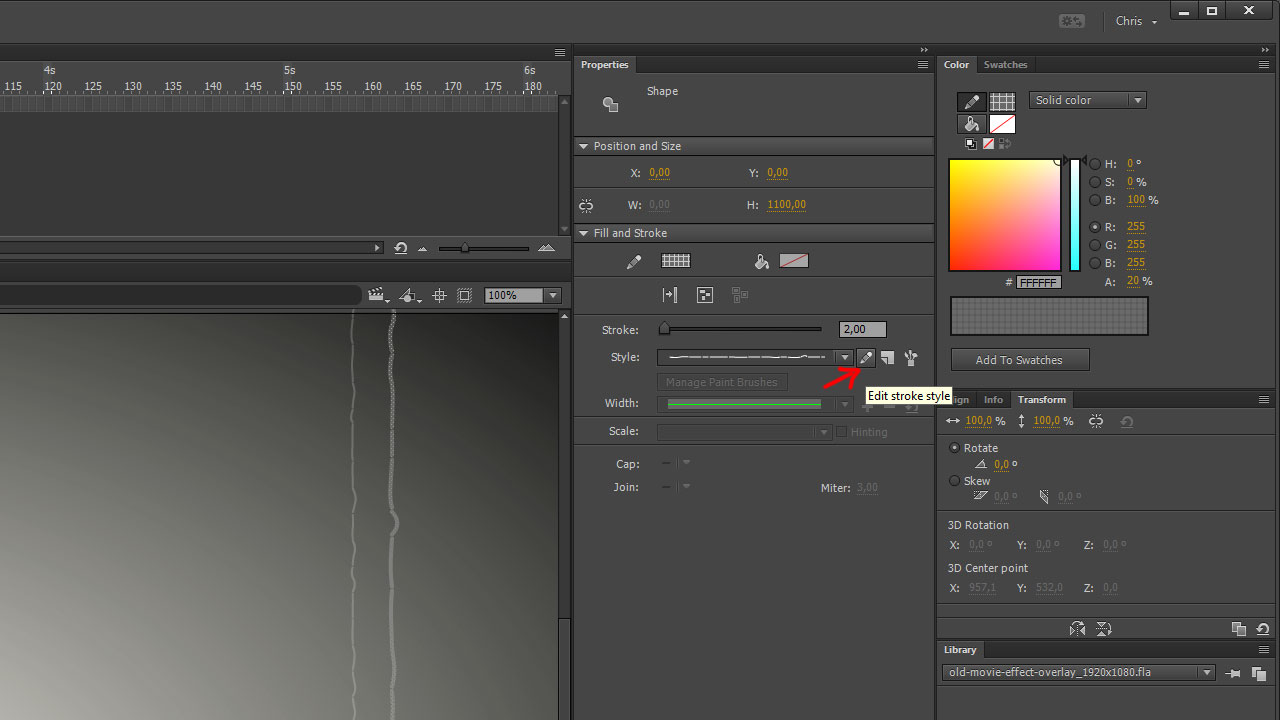
The 2 Flash library symbols for the vertical strokes are short animations made of 3 frames staying 2 frames each. So the total length for this 2 animations is 6 frames. If you want to adjust the stroke style and width, make sure to apply the same settings for all the 3 differing keyframes in the animation. The stroke color is set to white with a 20% opacity. To adjust the stroke settings open the "properties" panel and select the stroke you want to modify. In the modify panel you will find all parameters that can be changed.
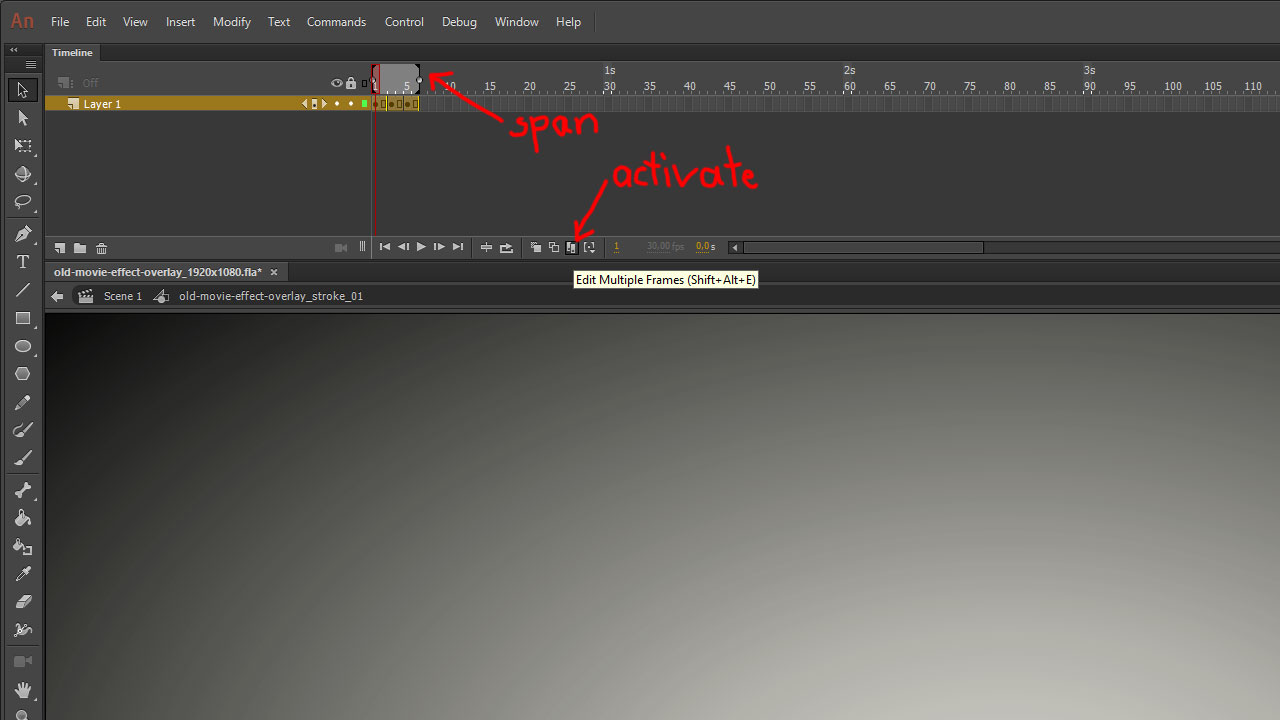
You can also activate the "edit multiple frames" mode with a tiny icon at the bottom of the Flash timeline. Make sure to choose the span (on top of the timeline) to include all the frames you want to edit at once. Hit "STRG+A" (Windows) or "OPTION+A" (Mac) to select all the contents of the frames within the chosen span. Please pay attention that the 3 stroke styles are different for all the 3 frames to achieve an animated stroke style in the final output. So if you edit the stroke style for all the 3 keyframes at once, create slight variations with the style settings after that for each of the keyframes.
The dust and scratches
There are 6 clips containing dust and scratches that are randomly placed in the 20 seconds timeline that are displayed for 3 or 5 frames. Each of the graphics is displayed 5-6 times within the 20 seconds. You can edit each of the 6 "dust" clips by double-clicking a symbol in the library. Better click a clip twice on the stage to edit its contents in place to see your changes in the layout.
There are many ways to create dust and scratches. You can even copy+paste graphics from illustrator. Just make sure to not use raster effects in Illustrator to maintain the graphics as vector shapes. Keep an eye on the library symbols after pasting graphics from Illustrator. No new symbol or even an image should appear in the library after pasting. If so, try to figure out what caused the extra symbol or bitmap data in your Flash library and avoid this technique in Illustrator.
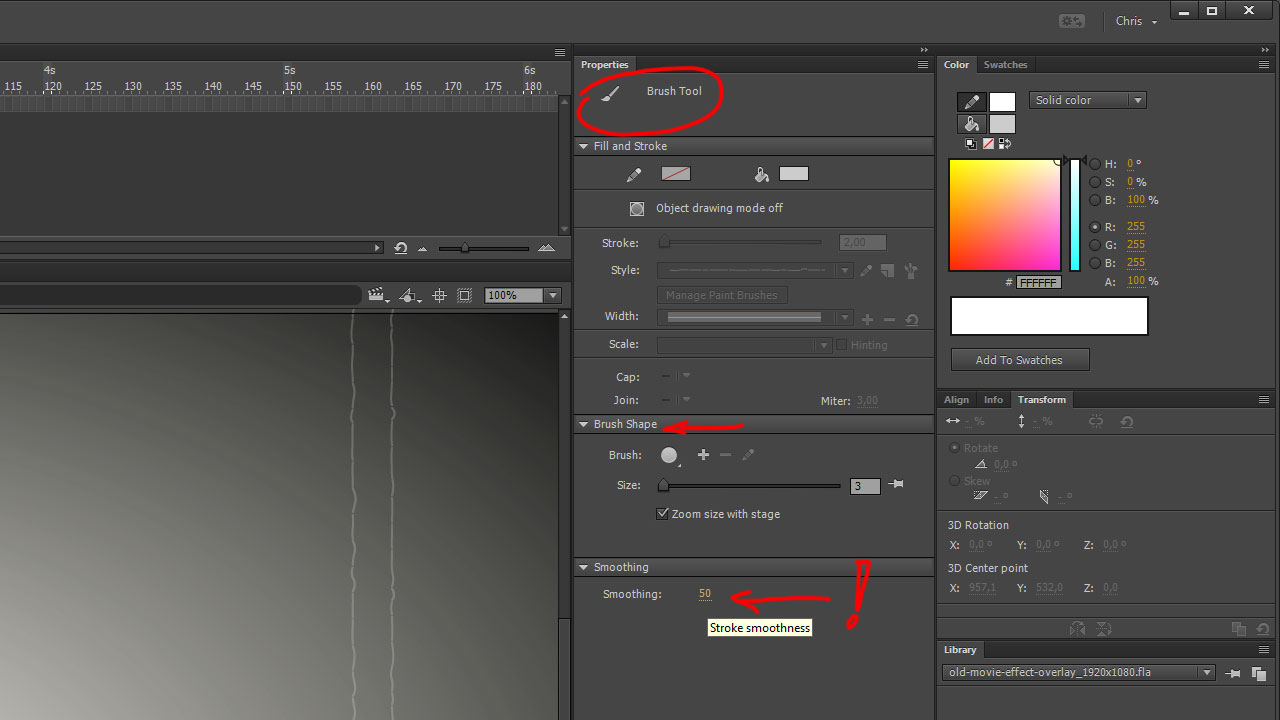
You can also use the pencil or brush in Animate to draw dust and scratches. There are many options for the pencil and brush settings to create smooth and dynamic strokes.The main difference in using the pencil and the brush is the type of object. Both tools can draw 3px thick lines which might not differentiate at the first sight. But the pencil draws strokes and the brush draws fills (shapes). So you have all the related properties available for modification in the properties palette.
Pay attention to your zoom level while painting. If you choose the smallest brush size in Animate, the stroke width will be twice as thick when painting on the canvas with 50% zoom instead of 100% zoom. Vice versa the stroke will be twice as thin, when painting with a 200% zoom level. Guess how thin the stroke will be when painting with 400% zoom. In more recent versions of Flash you can activate and deactivate this behaviour by checking/unchecking "Zoom size with stage" in the properties panel brush shape options.
The flickering
The flickering is a graphic clip with an opacity animation of the solid color clip. The color clip is 100% black that is animated randomly from 6% over 12% to 18%. Just change the solid's color in the "flickering_color" clip if you want to give it a special toning. The clip containing the animation is set to 75% opacity in the main timeline. You can adjust this opacity value to enhance or reduce the color flickering effect.
The vignette
The vignette is just one library symbol without any animation. In that clip is a rectangular with the frame size of the file. This rectangular is filled with a radial gradient fill that is transformed to be oval to fit the frame size and have all edges darkened evenly. To adjust this gradient fill click inside the movie clip containing the vignette. Click the rectangular inside and choose the transform tool in the animate tools palette. If you hold and drag the mouse over the transform tool a submenu appears where you can choose the gradient transform tool. You can also hit the F key to select this tool. Clicking the rectangular containing the gradient fill with that tool, will let you transform the gradient's colors, span, radius and oval. To change the colors of the gradient refer to the "color" palette. If it's not there choose "window" from the title menu and choose "color" to see this palette. Changing the gradient's colors works as in any other Adobe graphic design software.
The sepia color toning
The sepia color toning actually is the same like the vignette, just with a different fill. It's a bright desaturated yellow color fill. The movie clip in the main timeline containing this color fill is set to 30% opacity. Adjust the opacity in the properties panel to fit your desires. You can choose a different color or make this layer a "guide" to deactivate it in the SWF file output.
Special techniques from the modify menu
In the title menu "modify" you will find the "shape" submenu, that contains the most powerful functions to automagically modify any vector shape. Please note: A vector shape in the sense of Flash is either a drawing on the stage with the Flash vector drawing tools or a compound object, that can be created in Flash choosing "modify" from the title menu and then "combine objects" which is similar to the Pathfinder in Illustrator. You can also hit "CTRL+U" (Win) or "CMD+U" (Mac) with one or more separated shapes selected to make it a union (compound object). A movie clip from your library or a group is not a vector shape. So you cannot apply the commands from the modify shape menu to that kind of objects. Instead you have to double click the symbol or the group to jump inside and modify its vector shapes there.
Like in Illustrator the vectors inside Flash also consist of strokes and fills. You can also convert strokes to fills. You will drop the stroke options in the properties panel when converting strokes to fills. But there might be some good reasons to do so if you know what you are doing. You can also add strokes to any shape that does not have a stroke yet with the click of a button. Select the "Ink Bottle Tool" from the tools palette or just hit "S" to select this tool. Place this tool over the edge of a shape and press the left mouse button to create a stroke for this shape. If you click the stroke once you just select one segment of this stroke. Double-click a stroke to select all adjacent stroke segments.
Advanced smoothen, advanced straighten
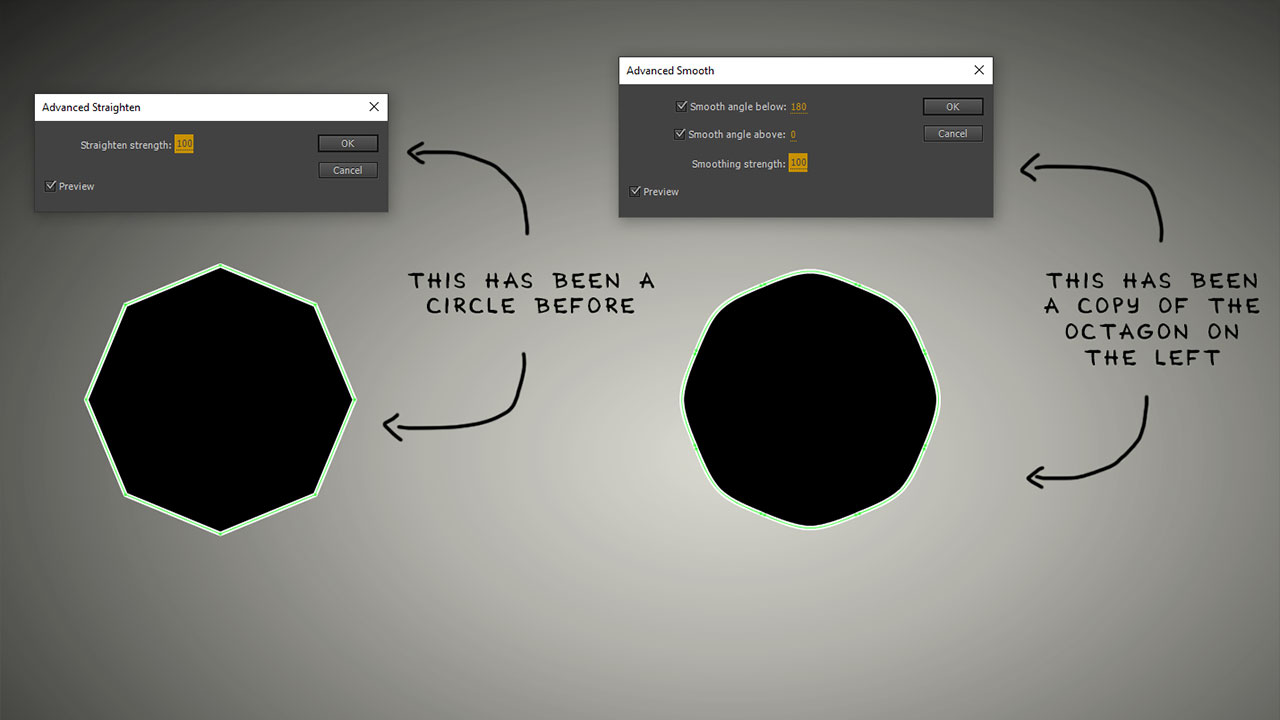
These are the "pro functions" of the two first entries in the modify shape menu (smooth, straighten) and they do what the name suggests. If you drew an edgy shape or line and want it to be more curvy use the "advanced smoothen" or vice versa use the "advanced straighten" if you want to have a curvy shape or line more edgy. If you have a circle and apply "advanced straighten" with a value of 100 the circle will become an octagon.
Optimize
The optimize is there to reduce the complexity of a path without changing its shape significantly but heavily reducing file size by removing unnecessary points in the vector shape. This is an essential tool to create display ads when it comes to save some data after finalizing your animation. This also might smooth lines and reduce detail especially when applied to hair or grass. Play around with the options to see if this helps you.
Convert lines to fills
This function exactly does what it says. There might be some good reasons to convert lines (strokes) to fills. Eg. if you wanted to have crisp and accurate vertical or horizontal 1px lines you should convert these lines to fills.This is because a vector line does not have a weight and is placed exactly at x:10px and y:10px. If you do not have a closed shape you cannot choose to apply the stroke outside or inside the line. Instead the 1px stroke is applied centered around the stroke. So 0.5px is in one pixel and the other 0.5px are in the next. As a screen cannot display half pixels the line gets blurred left and right to simulate a lighter appearance. If your stroke is 2px wide or any even number of pixels you do not have to convert this stroke to fills. If your stroke width is any odd number of pixels the left and right sides of a vertical stroke might be blurry. As well as the top and bottom of horizontal lines with odd stroke width. This might not be relevant for this old movie effect, but this information might help you if you want to create crispy, optimized display ads.
Expand fill (also inset fill)
If you created your own "dust and scratches" in the 1920x1080px FLA file and want to use it in a 3840x2160px layout you should first copy+paste the 6 library symbols into the 4k version with the option to "replace existing items". Drag all the clips you want to update in another file to an empty keyframe in your source file. Cut them from there and change to the destination file and paste the contents anywhere on the stage. You will be asked to overwrite existing library symbols with the same name. Choose "replace existing items" to update all the clips with the new versions. After that delete all the pasted clips from the stage again as they have been updated in the library and are already placed in the whole animation. So you should never rename any library symbol or this quick and easy update from another file with the same library symbols won't work anymore.
After updating the library symbols in the 3840x2160px version with the contents from the 1920x1080px file you have to find an adequate percentage by which to scale the graphics (vector shapes) in the 6 clips proportionally up. Divide the new frame size by the old frame size. In this case its easy: 3840 divided by 1920 is 2. So you have to scale the 6 clips' contents to 200% (proportionally). The thickness is also doubled by upscaling this graphics and might appear to heavy now. This is why the "expand fill" function is a very helpful time saver here.
Just click inside the first clip you already upscaled and hit "STRG+A" (Win) or "CMD+A" (Mac) to select all the vector shapes in the stage. Now choose "Modify" in the title menu, then "Shape" then "Expand fill". You can choose to expand or inset your fill in the appearing dialogue. You can also enter decimals smaller than 1. Eg. enter 0.5 and choose "inset" to reduce the shape by 0.5px around all edges. You can undo this and try another value to get closer to your desired thickness. Do this for all clips you have copied and upscaled from a smaller version.
Soften Fill Edges
If you want to have your shapes a little blurry you can create blurry vector shapes with this function from the modify shape menu. You can choose the distance of the blurry edge, the number of steps and if the soft fill edges are added to your original shape (expand) or subtracted from your original shape (inset). If you choose "inset" the corners are not rounded. The 90° angle is maintained. But this sharp corner does not look natural with the blurry edges. Choose "expand" for a more realistic look of blurry shapes.
You can also choose the width (distance) of the blurry edge in pixels and the number of steps. So if you choose a distance of 10px and 10 steps, one stept is exactly 1px wide. This is what you want to have in most cases when using this command.
Adjusting the effects in Adobe Premiere
The "Old Movie Overlay Effect" is imported into Premiere via an After Effects composition. There is no need to open and edit any of the compositions in After Effects. Of course you can do so and add some extra spice to the effect in the After Effects composition, but I suggest to keep it simple and just add any additional effects in Premiere. Only built-in filters are used. There are no additional 3rd party plugins used to create this hand-crafted old movie effect.
Effects used in Premiere
- Lumetri Color (used on 1 adjustment layer)
- Noise (used on 1 adjustment layer)
- Posterize (used on 1 adjustment layer)
- Camera Blur (used on 1 adjustment layer)
- Posterize Time (used on 2 video layers)
Lumetri Color
The "Lumetri Color" effect is modified in the "Basic Correction" and in the "Creative" section. In the "Basic Correction" the values for "Tone" and "Saturation" are modified. Tweak these values to make it yours or keep this settings. In the "Creative" section the LUT "SL Bleach NDR" is used with an intensity of 80. Adjust this setting up to 200 to fulfill your desires. In the adjustments the tints for shadows and highlights are adjusted to meet the red and orange toning of bleached old movies.
Noise
The "Noise filter" is set to "Color Noise" with an intensity of 50% for FHD/2k and 100% for UHD/4k and has to be executed before the camera blur filter in order to give it a softer and more grainy look. You can replace this filter with any 3rd party filter for grain.
Posterize
The "Posterize" filter is used to reduce the amount of colors to 32 colors. Disable this effect if you do not want to reduce the colors of your original clip.
Camera Blur
The "Camera Blur" filter is used to reduce the sharpness of modern video footage to meet the look and feel of old movies. Increase or decrease the value to make it more or less blurry.
Posterize Time (used on 2 video layers)
This effect is used on the main video sequence layer (composition "place-clip-here") and on the old movie overlay after effects composition layer to create a video with a frame rate old movie cameras were capable of. So keep this effect's settings the same for both layers. If you are unsure what the right frame rate (FPS) for your movie is, just search the internet for the frame rate the camera you want to simulate has been capable of. All the desired frame rates might range from 12fps to 24fps. While 18-24fps were mostly used by later professional Super8 and Cinema cameras and 12-16fps were used by amateur home video cameras.
